
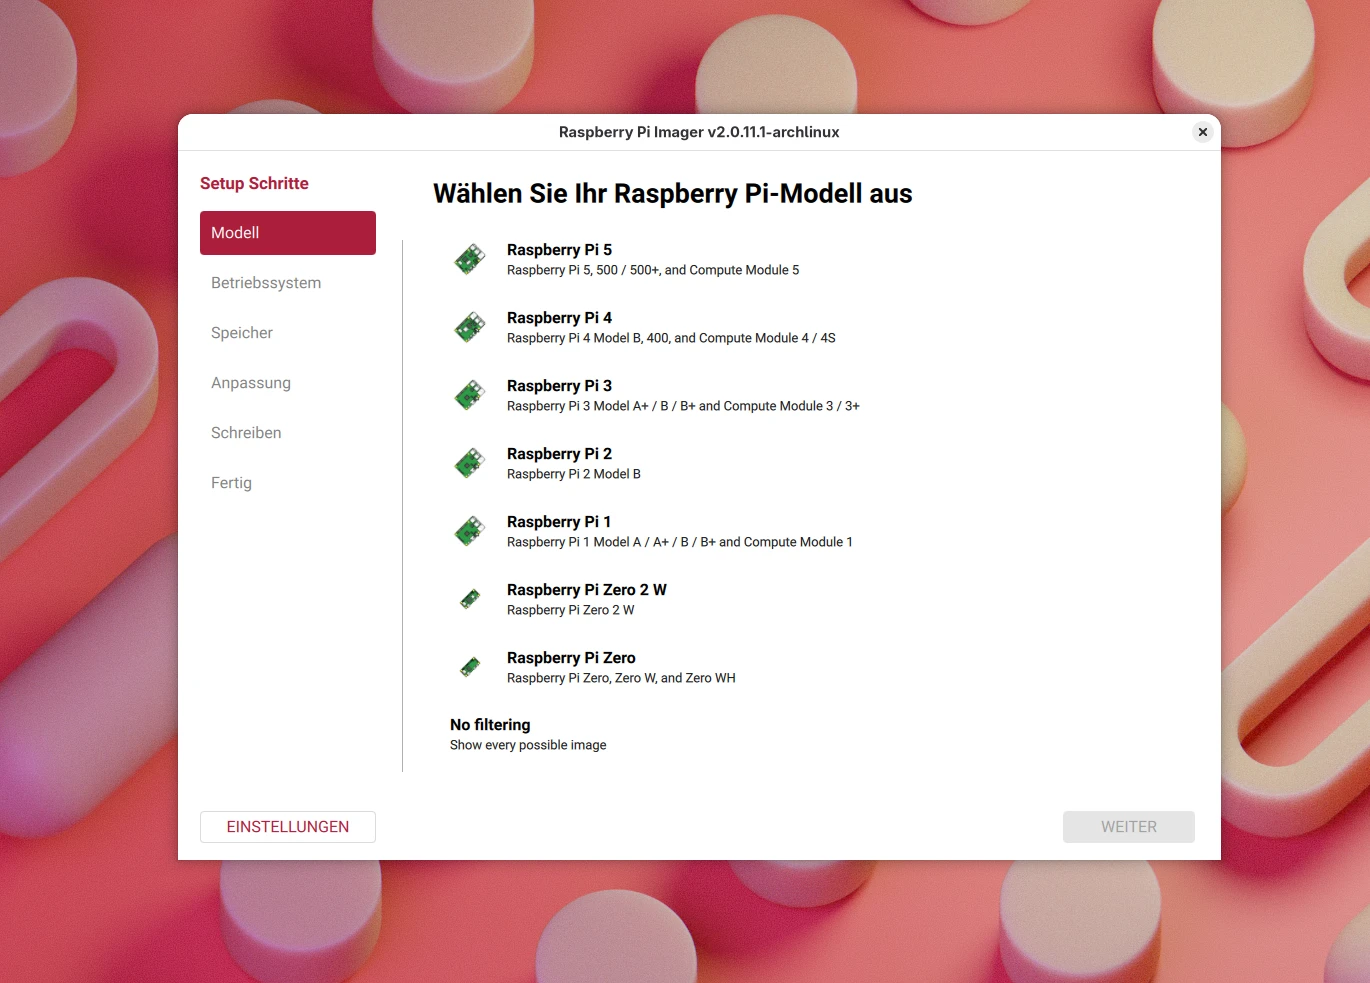
Lately I’ve been putting my Raspberry Pis to work a lot more often again. And anyone starting new projects on the little computer inevitably ends up back at the Raspberry Pi Imager. The last time I used the program regularly, it was still a plain window with three buttons and a hidden settings dialog.
So I wanted to take another look at what has happened with the Imager since then. The short answer: quite a lot. The long answer – with a special focus on us Linux users and the little pitfalls that most guides gloss over – is what this article is about.
What is the Raspberry Pi Imager?
The Raspberry Pi Imager is the official tool from the makers of the Raspberry Pi for writing operating system images to a microSD card, a USB stick or an SSD. Unlike a plain old dd, the Imager downloads the images directly, decompresses them on the fly, writes them and then verifies the result.
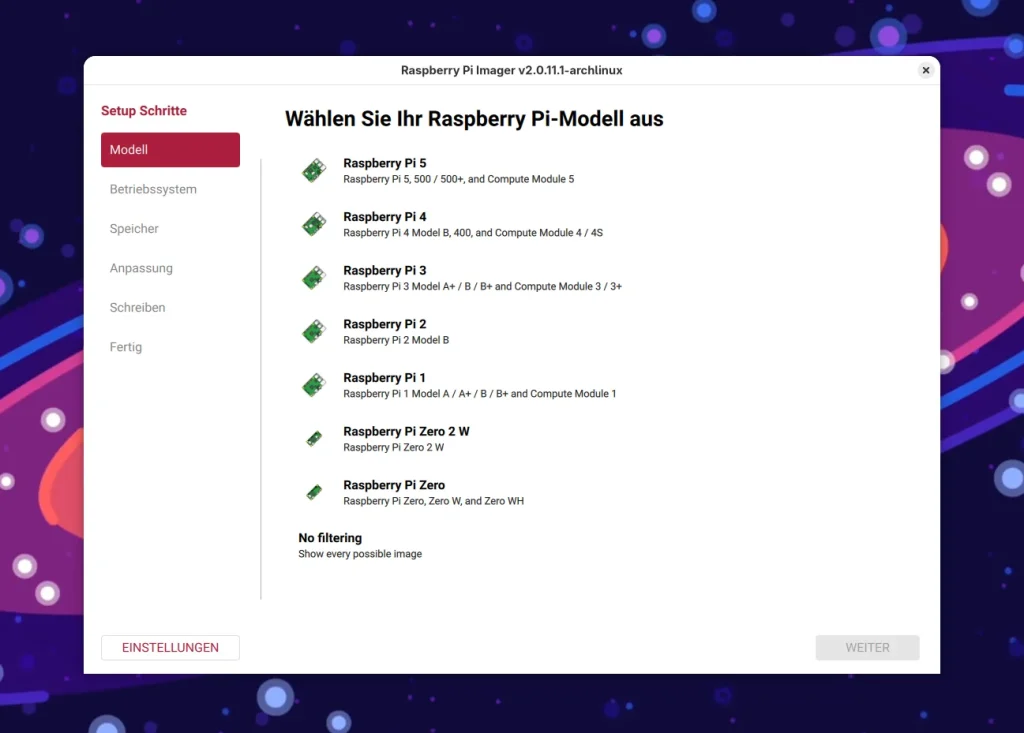
Besides Raspberry Pi OS, the selection also includes Ubuntu, media centre distributions, retro gaming systems, images for 3D printers and home automation as well as utility images, for example for updating the bootloader. The program is licensed under Apache 2.0, and the source code lives on GitHub. So you can check at any time what it is doing on your machine.
The real highlight, though, is the pre-configuration: hostname, user account, Wi-Fi, time zone, keyboard layout and SSH access can all be set before the first boot. The Pi then joins the network fully set up – ideal for headless operation, where you want to get by without a monitor and keyboard.
What’s new in Raspberry Pi Imager 2.0?
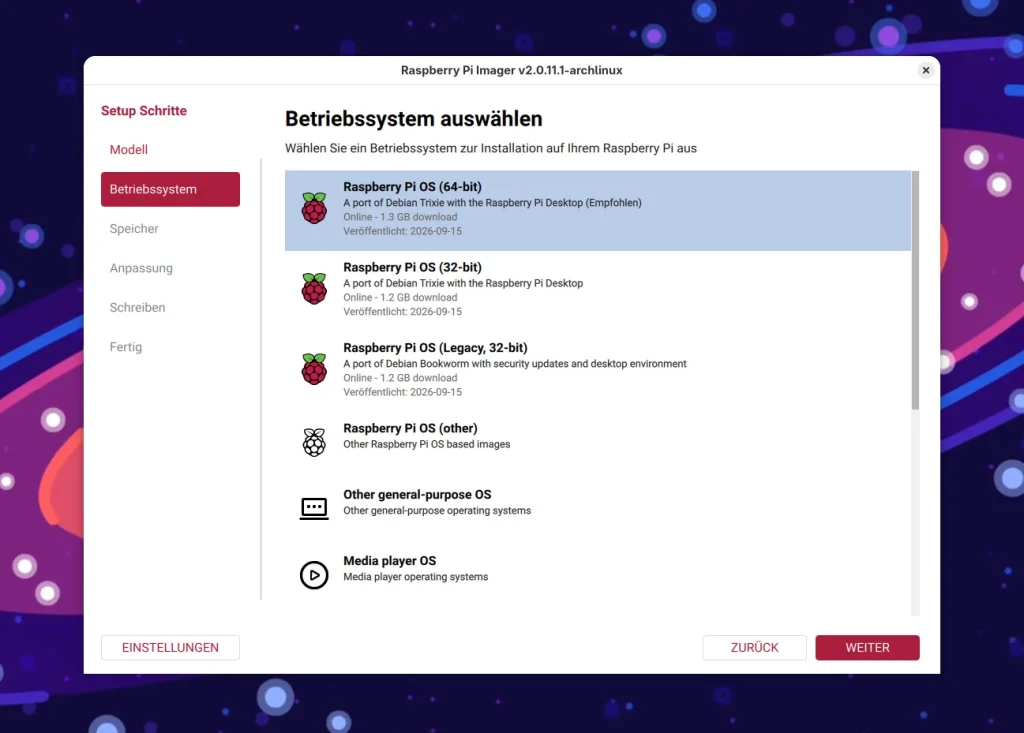
At the end of November 2025, the Foundation released Raspberry Pi Imager 2.0; by now version 2.0.11 is current (or 2.0.11.1 as a hotfix). A lot has changed under the hood since then, but above all the program looks completely different. The most important changes at a glance:
- Wizard instead of a single window: You now click your way step by step through device, operating system, storage device, customisation and writing.
- Customisation in plain sight: The formerly hidden dialog for the “advanced options” (
Ctrl+Shift+X, anyone?) is now a regular step in the wizard. - Location by capital city: Instead of country codes you pick a capital city, and the Imager derives the time zone, keyboard layout and Wi-Fi regulatory country from it.
- Interfaces at the click of a mouse: I2C, SPI, 1-Wire, the serial interface and USB gadget mode (the Pi presents itself as a network device on the USB port, so SSH works straight over the cable) can be enabled directly in the Imager, with no detour via raspi-config.
- Raspberry Pi Connect: You can sign in with your Connect account while writing, and the Pi then shows up in remote access right after the first boot. Since version 2.0.10 this also works with Connect for Organisations.
- Accessibility: The interface can be operated entirely by keyboard and is labelled for screen readers.
- Stricter verification: The Imager forces the operating system to actually confirm written blocks. This can make writing take a little longer, but the result is more reliable.
Something has been removed as well, though: custom image files can still be written, but can no longer be pre-configured with hostname, Wi-Fi and so on. The developers justify this by saying the feature was never officially supported. Only images that are flagged accordingly can still be customised.
So if you have been pre-configuring a self-built image with the Imager, you’ll need to find another way – or turn to the CLI mode, which I introduce further down. There is good news on SSH keys, however: support for multiple keys, which was dropped when 2.0 launched, has since returned.
Installing Raspberry Pi Imager on Linux
This is where things get interesting for us Linux users, because the distributions differ considerably. The official download page offers an AppImage for Linux. On GitHub there are additionally .deb packages for amd64, arm64 and armhf as well as a pure command-line version. What your distribution ships, however, is a different story.
Arch Linux: up to date straight from extra
As so often, Arch users have it easiest: the Imager is in the official extra repository and is up to date there (version 2.0.11.1 at the time of writing). No AUR helper is needed; a simple pacman call is enough, and the Imager is ready in your application menu:
$ sudo pacman -S rpi-imagerThe Arch package ships a Polkit rule. If you launch the Imager normally from the application menu, it requests the necessary privileges itself via pkexec – so you just enter your password in the Polkit dialog. If you use an AUR helper such as Paru or Yay, you’ll also find rpi-imager-git in the AUR – normally you won’t need it.
Ubuntu: hands off Universe and Snap
On Ubuntu, by contrast, there is a trap that none of the usual guides say a word about. A sudo apt install rpi-imager does work, but even on Ubuntu 26.04 it still installs the ancient version 1.8.5 from universe. The snap in the Snap Store is stuck at version 1.9.6 as well.
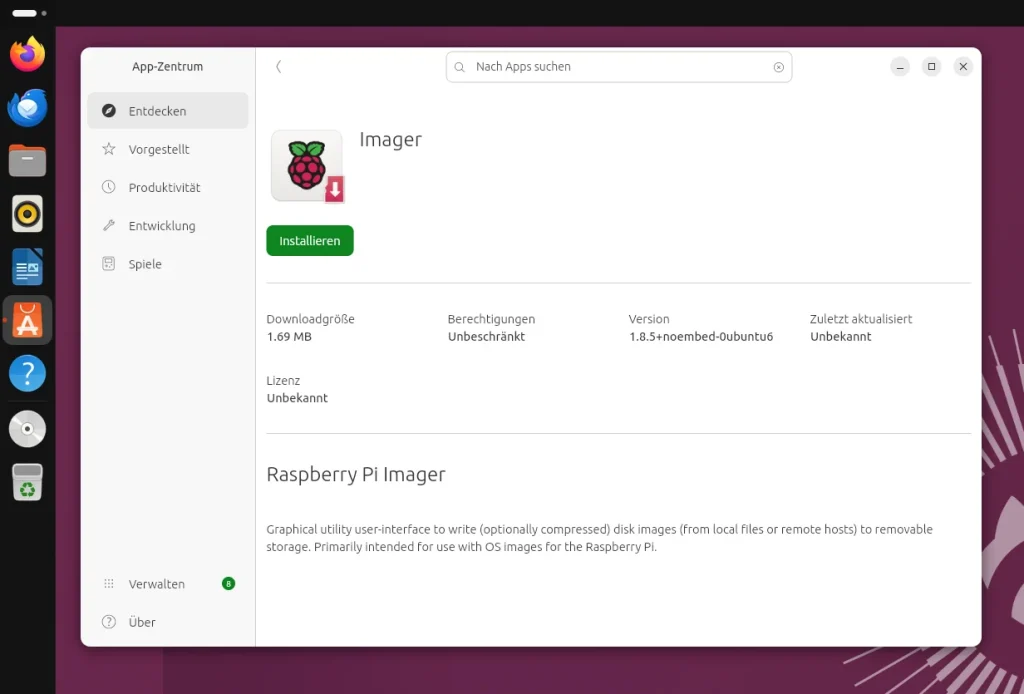
So neither package gets the new wizard, Raspberry Pi Connect or the bug fixes of recent months. Ubuntu users are therefore better off with the AppImage, the Flatpak (both covered below) or the official .deb package from GitHub. Replace <version> in the command with the version number of the file you downloaded:
$ sudo apt install ./rpi-imager_<version>_amd64.debIf you already have an old version installed via apt or Snap, remove it first so that you don’t end up with two Imagers side by side in your application menu. Otherwise you may accidentally launch the old version and wonder where the features have gone.
$ sudo apt remove rpi-imager
$ sudo snap remove rpi-imager
AppImage: the official route for all distributions
The AppImage works regardless of distribution – so on Fedora, openSUSE and the like too. Download it from the official download page, make it executable and run it; no installation is required. Here, too, replace the <version> placeholder with the version number from the file name:
$ chmod +x Raspberry_Pi_Imager-v<version>-desktop-x86_64.AppImage
$ ./Raspberry_Pi_Imager-v<version>-desktop-x86_64.AppImage
On first launch without root privileges, the Imager complains and offers you the Install Authorization button. If you click it, it places (after you enter your password) a Polkit rule under /etc/polkit-1/actions/ that applies to exactly this path of the AppImage. After that, it obtains the privileges by itself on every launch.
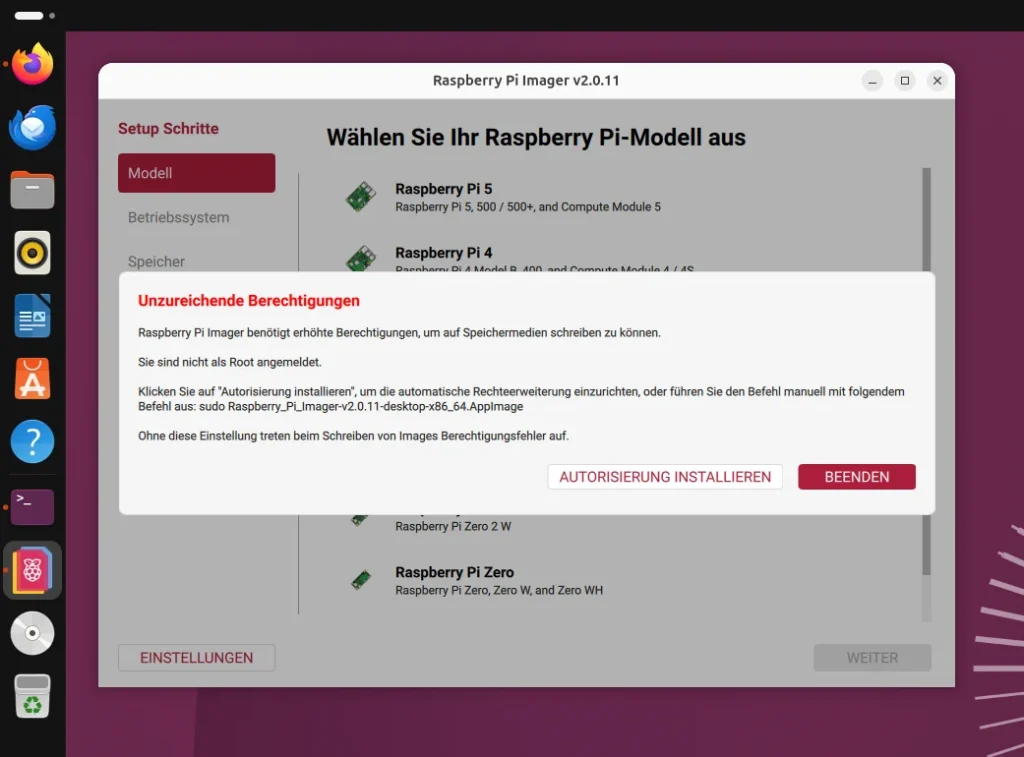
If you later move the AppImage to a different folder, you have to set up the authorisation again. If you’d rather work without a permanent rule, launch the AppImage with sudo. There is a stumbling block here that Michael Kofler points out in his article: sudo does not search the current directory, so you have to specify a path.
$ sudo ./Raspberry_Pi_Imager-v<version>-desktop-x86_64.AppImageWithout the ./ all you get is “command not found”. Curiously, the Imager itself suggests exactly this command without a path in its missing-privileges dialog. On Ubuntu 24.04 a second trap awaits: there the AppImage crashes right at startup because Qt is missing a library for X11. In the terminal it looks like this:
$ ./Raspberry_Pi_Imager-v2.0.11-desktop-x86_64.AppImage
Platform: Linux 7.0.0-38-generic (x86_64)
qt.qpa.plugin: From 6.5.0, xcb-cursor0 or libxcb-cursor0 is needed to load the Qt xcb platform plugin.
qt.qpa.plugin: Could not load the Qt platform plugin "xcb" in "/tmp/.mount_RaspbedIOBeG/usr/plugins/platforms" even though it was found.
This application failed to start because no Qt platform plugin could be initialized. Reinstalling the application may fix this problem.

Available platform plugins are: eglfs, linuxfb, minimal, minimalegl, offscreen, vkkhrdisplay, vnc, wayland-brcm, wayland-egl, wayland, xcb.

Aborted (core dumped)
The fix is the libxcb-cursor0 package, which you install as usual through the package manager. After that, the Imager starts without complaint on Ubuntu 24.04 too. On Ubuntu 26.04 the problem no longer occurs. The libfuse2t64 package that used to be recommended so often, on the other hand, was no longer necessary in my test.
$ sudo apt install libxcb-cursor0By the way: the 2.0.11.1 hotfix has so far only been released for Windows, macOS and as a .deb package; as an AppImage, 2.0.11 is the latest version. That’s no big deal, though, because the hotfix merely fixes a bug when signing in to Raspberry Pi Connect. If you don’t use Connect, you’re not missing anything.
Flatpak: convenient, but not verified by the vendor
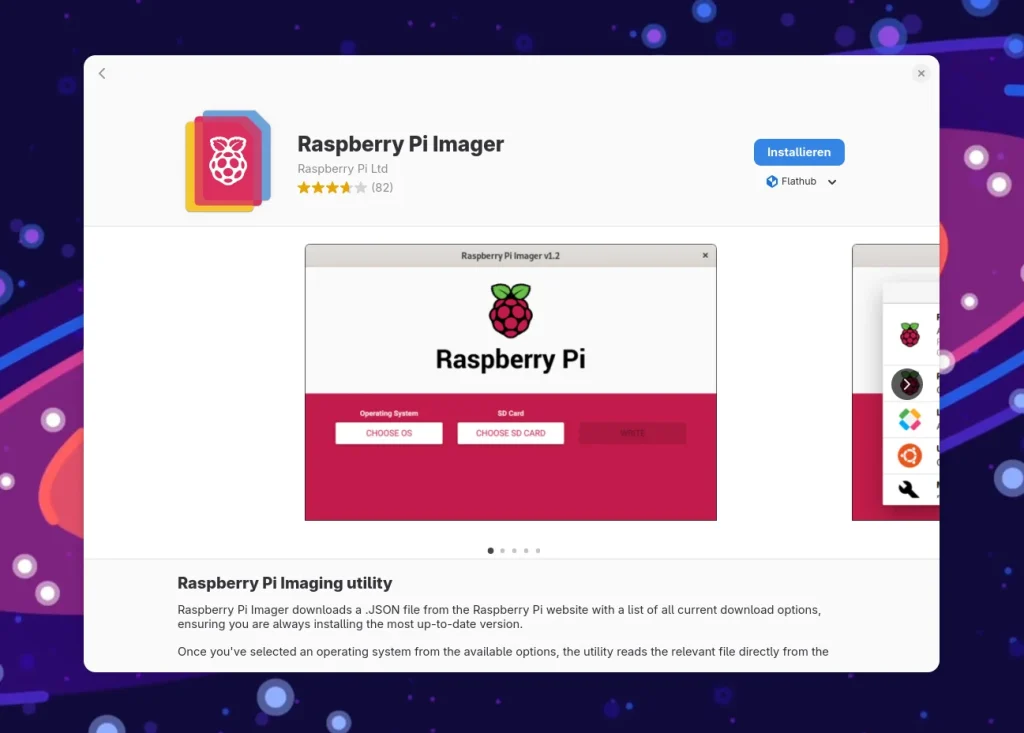
On Flathub the Imager is available as org.raspberrypi.rpi-imager in the current version. The Flatpak gets full access to all devices and talks to UDisks2 to write to storage devices. A nice touch for the privacy-conscious: it is built without telemetry. Installation works as usual:
$ flatpak install flathub org.raspberrypi.rpi-imagerNote, however, that the app is not marked as verified on Flathub. Flathub does name Raspberry Pi Ltd as the developer, but that doesn’t tell you whether Raspberry Pi maintains the package itself. As a rule this isn’t a problem, but you should be aware of it.
Raspberry Pi OS
If you want to use the Imager directly on a Raspberry Pi, for example to prepare a second card or an SSD for another Pi, you install it on Raspberry Pi OS the classic way from the package sources. Here the package comes straight from the Foundation’s repositories, unlike on Ubuntu:
$ sudo apt update && sudo apt install rpi-imagerOn the Raspberry Pi 4 and 5 you can get by without a second computer entirely: their bootloader can use network install to load a stripped-down version of the Imager from the internet, which you then use to write an SD card or SSD directly in the Pi. With version 2.0.11, this network installer was noticeably reworked and slimmed down.
Why does the Imager need root privileges at all?
On Windows and macOS you hardly notice it, but on Linux you do: the Imager writes directly to the block device, for example /dev/sdb or /dev/mmcblk0, and a normal user isn’t allowed to do that. Version 2 therefore takes care of obtaining the necessary privileges via pkexec itself.
The prerequisite is a matching Polkit rule. With the Arch package and the official .deb it is installed along with the program; with the AppImage you create it via Install Authorization. If you launch the Imager via sudo or pkexec, settings and the download cache still end up in your home directory and not in /root, because the Imager detects the calling user.
A little tip for the tidy-minded: the rules created by the AppImage are named com.raspberrypi.rpi-imager.appimage-<hash>.policy and live under /etc/polkit-1/actions/. If you delete the AppImage, you can remove the corresponding rule there by hand. This also works on distributions with a read-only /usr such as Fedora Silverblue, since the Imager deliberately writes to /etc.
How to write an image with Raspberry Pi Imager
Actually using the program is quickly explained thanks to the new wizard. You work your way from top to bottom through five steps and can go back a step at any time if you’ve misclicked. Writing only happens at the very end after an explicit confirmation prompt, so nothing happens to your SD card before that:
- Choose device: First you tell the Imager which model the image is intended for, such as Raspberry Pi 5 or Raspberry Pi Zero 2 W. The list of operating systems is then filtered accordingly.
- Choose operating system: Here you pick Raspberry Pi OS (with or without desktop, 32-bit or 64-bit) or one of the many other distributions. Via Use custom you select a locally stored image.
- Choose storage device: Now it’s the turn of the SD card or USB stick. More on that in the next section.
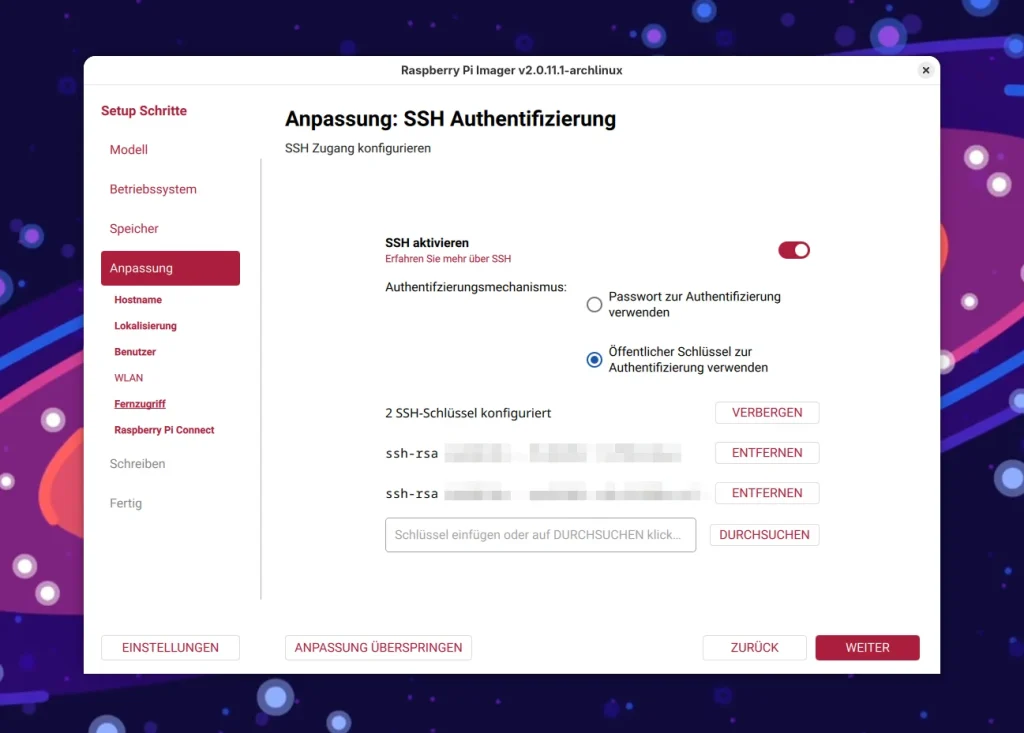
- Customise: Hostname, location, user and password, Wi-Fi, SSH (by password or public key), Raspberry Pi Connect and interfaces such as I2C and SPI. Depending on the operating system, the Imager writes these settings to the boot partition as
firstrun.sh, as a cloud-init configuration or in another format. - Write: After a confirmation prompt, the Imager downloads the image, writes it and verifies it. Images that have been downloaded once end up in the cache, so writing the same image again is considerably faster.
If you want to set up several Pis in one go, you’ll appreciate the option to write another card at the end of the wizard. It lets you write the same image including customisations once more without having to click through all the steps again. Just remember to change the hostname.
My tip for headless operation: store your public SSH key right away instead of a password. Then you can connect to the Pi via ssh immediately after the first boot without ever having to type a password. If you access it from several machines, simply enter several keys.
If you set up a Pi afresh with the same hostname, SSH will complain about a changed host key at the next login. In this case there is no attack behind it; the freshly installed system has simply generated new keys. A single command fixes the problem quickly.
Careful: pick the right drive
Probably the most important point of all: the Imager overwrites the selected storage device completely and does not check whether it still contains data. Michael Kofler rightly criticises that the icons for SD cards and USB devices in the selection can be confusing and that the summary doesn’t show the concrete device name such as /dev/sde.
Sure, the Imager hides system drives by default, but an external backup disk on the USB port is just another removable drive as far as it is concerned. On Linux, however, you have a simple way of playing it safe: use lsblk before and after plugging in the SD card to see which device has been added.
$ lsblk -o NAME,SIZE,MODEL,TRAN,MOUNTPOINTS
NAME          SIZE MODEL                TRAN   MOUNTPOINTS
sda           4.5T WDC WD50NDZW-11BCSS1 usb
└─sda1        4.5T                             /mnt/backup
sdb         117.2G Speed Line           usb
├─sdb1        198K
├─sdb2        2.8M
└─sdb3        4.6G
zram0         3.8G                             [SWAP]
nvme0n1       3.6T CT4000P3PSSD8        nvme
├─nvme0n1p1   512M                      nvme   /boot
└─nvme0n1p2   3.6T                      nvme   /var/log
                                               /var/cache/pacman/pkg
                                               /home
                                               /.snapshots
                                               /
In my example the situation is clear: sdb is the “Speed Line” USB stick with a good 117 GB and the remains of an old ISO image. sda, by contrast, is the external backup disk mounted at /mnt/backup. According to the TRAN column, both are attached via USB.
This is exactly where the danger lies, because to the Imager both drives are equally removable media. Size and model name tell you which device is the right one. To be on the safe side, it’s best to unplug all external hard disks before starting the Imager. A few seconds of caution certainly beat a flattened backup disk.
Incidentally, since version 2.0.11 the Imager locks the drive exclusively on Linux while it is writing to it. No other program can then access the card at the same time and wreck your freshly written image. Of course, that doesn’t protect you from picking the wrong drive – only a careful look helps there.
Raspberry Pi Imager in the terminal: CLI mode
What most guides don’t mention: the Imager can also be used entirely without a graphical interface. That’s handy for scripts, for working over SSH or when you want to prepare several cards. You activate CLI mode with --cli, followed by the image and the target device:
$ sudo rpi-imager --cli raspios.img.xz /dev/sdbThe image may be compressed (since 2.0.11 also as a multi-part .img.zst), and instead of a local file the Imager also accepts an HTTP or HTTPS address. rpi-imager --cli --help gives an overview of all options, and the Arch package also ships a man page. The most useful options in my view:
--sha256 <hash>checks before writing whether the image matches the expected checksum.--disable-verifyskips verification after writing (saves time, costs safety).--first-run-script <file>puts your ownfirstrun.shonto the image.--cloudinit-userdata <file>and--cloudinit-networkconfig <file>write your own cloud-init configurations to the card as well.--disable-ejectprevents the drive from being ejected after writing – handy if you still want to copy files to the boot partition afterwards.--quietonly prints errors, ideal for scripts.
The cloud-init options in particular are interesting: they give you more possibilities in the terminal than in the graphical interface, and that includes images which the Imager no longer customises in the wizard. For servers without a Qt interface, GitHub also offers a separate rpi-imager-cli package and a CLI AppImage, for which the --cli switch is not needed.
Custom image lists with –repo
One more treat for tinkerers, clubs and schools: with --repo you teach the Imager your own list of images. Instead of querying Raspberry Pi’s servers, it then reads a JSON file that is located either online or locally on your disk. The format is described in the repository under doc/json-schema.
$ rpi-imager --repo https://example.org/os_list.jsonThat way you can, for example, hand a club or a school class an Imager that only shows your own prepared images. Simply create a custom launcher in the application menu that calls the Imager with the appropriate parameter. The Imager takes care of the rest as usual.
Disabling telemetry
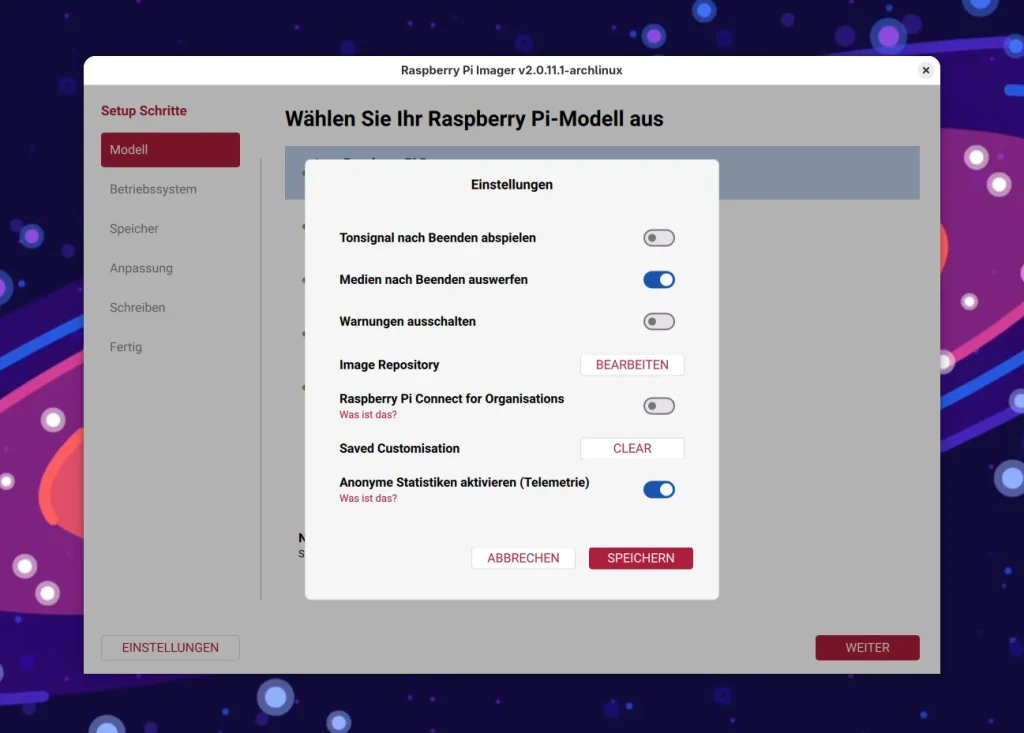
By default, on every write the Imager anonymously reports to Raspberry Pi which image you selected, along with the Imager version, your host operating system, the architecture and the language setting. According to the README, only counters are stored, and the aggregated data is publicly available at rpi-imager-stats.raspberrypi.com.
If you’d still rather not have that, switch off the statistics in the app options or launch the Imager once with the --disable-telemetry parameter, which saves the setting permanently. As mentioned above, telemetry isn’t compiled into the Flatpak in the first place. So there’s nothing you need to do there.
Common problems on Linux
The Imager reports that it isn’t running as root. With the AppImage, click Install Authorization or launch it with sudo ./…. With distribution packages, check whether the file com.raspberrypi.rpi-imager.policy exists under /usr/share/polkit-1/actions/. If it is missing, reinstall the package or launch the Imager with sudo as a test.
The AppImage won’t start. First check whether the executable bit is set (chmod +x). On Ubuntu 24.04, libxcb-cursor0 is also missing, without which the AppImage crashes right at startup. Launch the AppImage in a terminal as a test; then you’ll see the error message and know which piece of the puzzle is still missing.
Ubuntu shows the old interface. Then you’ve caught the version from apt or the Snap Store, both of which are still stuck at 1.x. Uninstall it and use the .deb from GitHub, the AppImage or the Flatpak instead. After that, the new wizard will greet you on Ubuntu too.
The SD card doesn’t show up. Use lsblk to check whether the card reader recognises the card at all. Some card readers only show a device after the card is reinserted, others simply don’t like certain cards. If the card doesn’t appear in lsblk either, the problem isn’t the Imager.
Writing takes forever. Verification reads the complete image back from the card once more after writing. With slow cards or USB 2 card readers this can take a while. A faster card helps more here than switching off the check. If verification fails, you should check your card for errors.
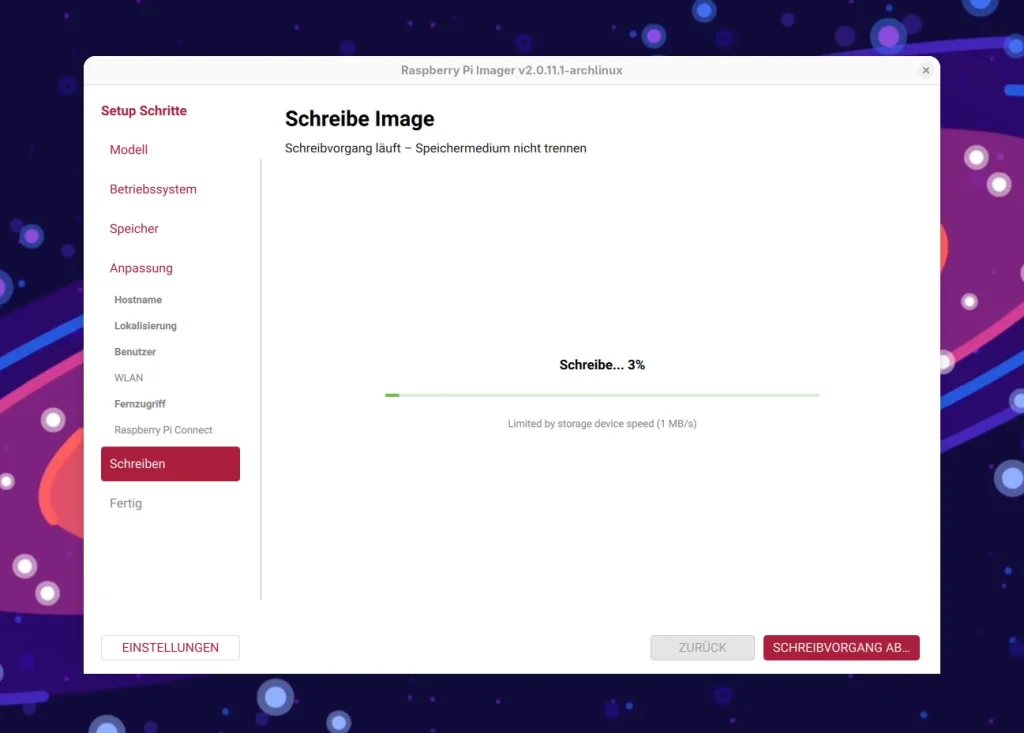
Faulty USB sticks or microSD cards. If the Imager shows the notice “Limited by storage device speed” while writing, the storage device is slowing the process down considerably. At just a few MB/s, a worn-out stick or a faulty card is often behind it. In that case, check the device for errors before you find yourself puzzling over an aborted verification.
Alternatives to Raspberry Pi Imager
Of course it doesn’t always have to be the Imager. If you’ve already downloaded an image, you can get there on Linux with built-in tools too – for instance with dd, with the Restore Disk Image function in GNOME Disks or the GTK4 tool Impression. You’ll then be missing the convenient pre-configuration, though, and will have to set up hostname, SSH and Wi-Fi by hand.
If, conversely, you want to back up an existing system and keep the image as small as possible, take a look at PiShrink. It shrinks an image you’ve read out down to the space actually used, and you can later write it back to a card with the Imager.
Better than dd, but not mandatory either
All in all, the upgrade to Raspberry Pi Imager 2.0 was a clear step forward in my view. The wizard guides even beginners safely through the setup, and for Linux users a good deal of fiddling has been eliminated, particularly when it comes to root privileges. Arch users simply install the program from extra and are done.
Ubuntu users, on the other hand, should definitely steer clear of the package sources and the Snap Store and go for the official package. And if you like working in the terminal, you should take a closer look at CLI mode with its cloud-init options. How do you prepare your SD cards? Do you use the Imager, or do you still swear by dd?
Leave a Reply